
Episode 05: Building a 1-Page Website in Canva
-

-
-

30 Oct, 2026
-
Adam Maguire, Video Strategist
06 Nov, 2026
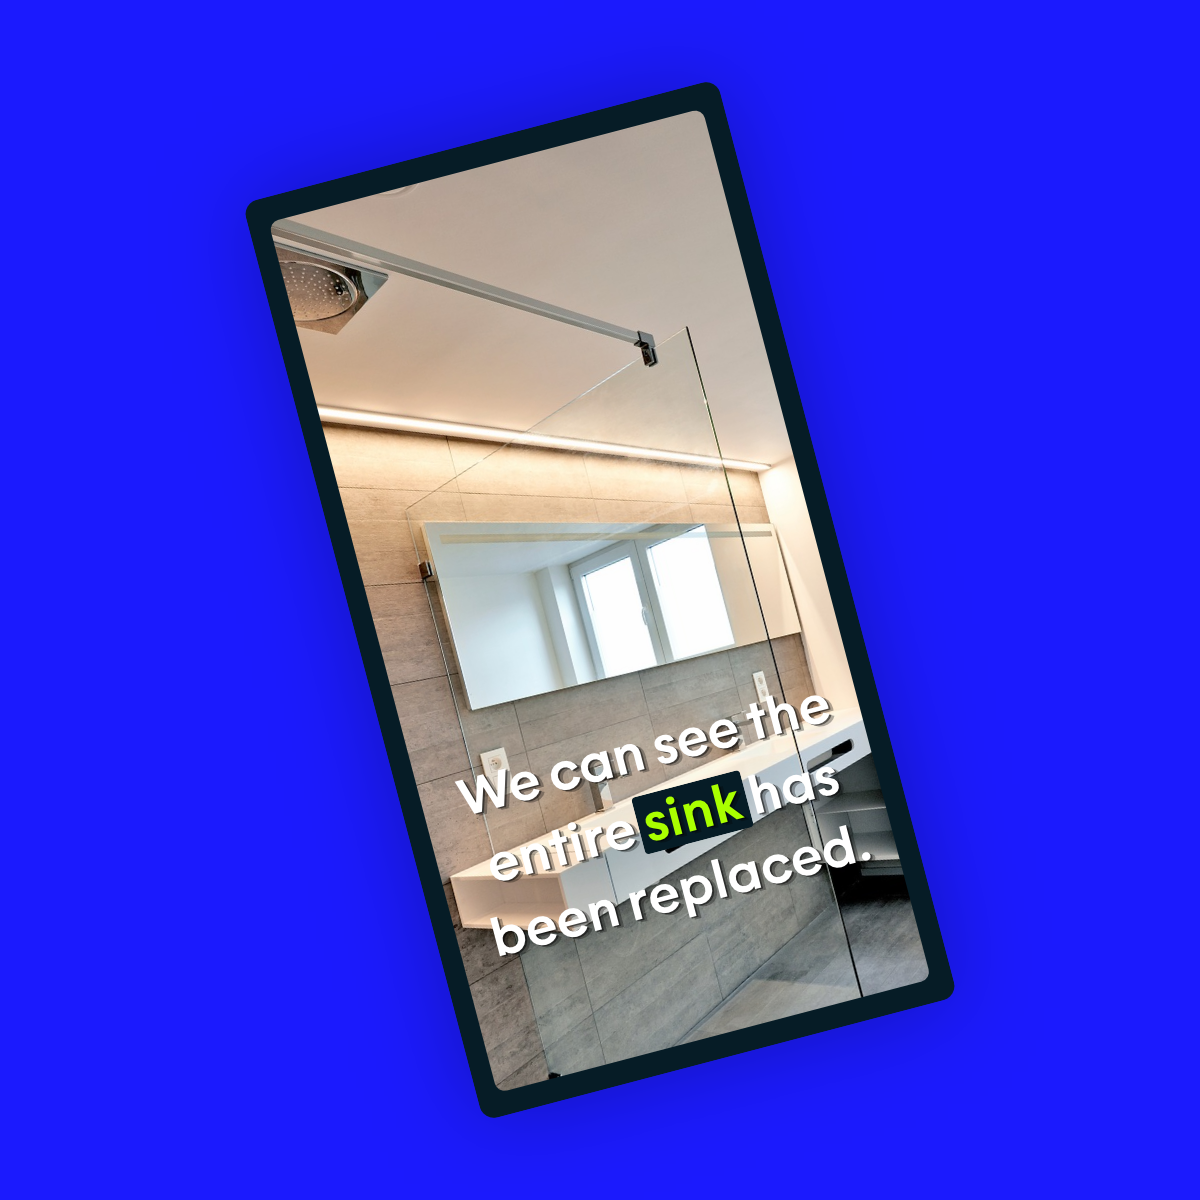
This episode of Fieldmotion's Growth Hub will cover the creation of optimised, animated social media subtitles within the free version of DaVinci Resolve. These are ideal subtitles for platforms such as TikTok, Instagram Reels and YouTube Shorts. Adam will discuss, vertical framing, generating the subtitles from your videos audio, animating them using word highlight and refining and repositioning them so the platform's UI does not obscure them.
Hi everyone, this is Adam from Fieldmotion and welcome to another episode of Fieldmotion's Growth Hub. So in this video we're going to look a little bit more into subtitles and it's something that we touched on a little bit before in the previous DaVinci Resolve tutorial, the editing tutorial, which was great for things like YouTube where it'll overwrite the sort of generated captions that YouTube likes to use sometimes and it just makes sure that there's no sort of punctuation errors or, you know, sometimes when it's listening to your voice back, it doesn't always get everything right.
But with those captions, you're able to go through and scrub through everything and just make sure it's all right. But for this video, we're going to be going more into what would work better on Facebook, Instagram, TikTok, those kind of platforms.
Subtitles I'm going to show you are perfect for audience retention. It's those animated ones that you'll see where each word that the person in question is saying will highlight and it's so contrasting to what's shown off in the video. Most people, believe it or not, will actually watch social media videos, be it Instagram for example, while they're commuting or walking down the street with the volume off. So it just gives them perfect context.
So without further ado, let's jump right in. So what we have here is we have a video. This is actually from our Yardbox customer testimonial. So this is Cormac here, and he was gracious enough to actually let us record a customer testimonial with him, and I want to use it as an example because it's a great looking video and it'll work really well for our purposes here.
So before I do anything with subtitles, you'll actually notice that we're actually working in a portrait view. This is because that's really what you're going to see with Instagram, Facebook, TikTok. So to get this view, we go into File and then we go to New Timeline. So because our previous video that we did was in horizontal view, that was the first timeline created, and then from then on each timeline sort of uses the project settings automatically.
We don't want that. We actually just want to customise this a little bit. So let's untick that and then go into format. So then we'll use vertical resolution here.
So you'll see that's the resolution at the moment, that's in 16-9, and we want 9-16. So all we have to do, don't even need to worry about the numbers, just use vertical resolution and hit Create, and that will show you this view here.
So we'll go to Timeline here, and then we'll use AI Tools and then go to Create Subtitles from Audio. So because we're working in a portrait view, everything's very narrow in our frame, and we want to make sure that the amount of text isn't totally overwhelming and it's not being cropped out, but it's punchy enough to where someone is going to be able to see it on the phone from, you know, quite a small, quite a small view.
So just like before, language, English, caption preset, it's Netflix, and I like to use about 14 characters per line, and then I like to double up the lines instead of single lines. So let's create that there, and because this is a shorter video and it's only about a minute or so long, it shouldn't take very long at all to analyse through and give us a subtitle track.
So yep, great. So we've got the subtitle track there, and anything that's, you know, cropping over, don't worry about that.
It doesn't look quite right, so, but for now we'll work with Word Highlight. So you'll see, I don't really like the yellow font too much, at least I don't, so I'll highlight all of the subtitles there, all the subtitle tracks, and anything that I do to one will be done to the others. So let's go to our fonts first, so let's change our font from that Open Sans to, let's do Geliat. So what Fieldmotion typically uses there, and we'll go semi-bold, and then we'll change the base colour of the text to white, and that's a bit better now already. So let's scale that up a bit, and if you want to scale back the whole video, you hit this zoom arrow here and hit Fit, and that'll bring you back to the default view.
So what we want to do is, let's size it up a little bit more, and then let's raise the text up a little bit, because a lot of these social media platforms, they'll have UI and maybe a little description at the bottom, and then the top will maybe have a search bar, for example, and we want to just kind of avoid having things overlay on top of our subtitle.
So, you know, people can actually see it properly and it just looks a wee bit cleaner as well. So next, we want to change the highlight colour, so let's go for a green there, a little bit more calm than red. There we go. And then that's a little bit nicer there.
As you can see, really easily, just what word he's on. But to highlight that even further, let's click Enable Background and then change the background colour. You'll see there's already now a frame around our word. Let's change that to, let's just change out the black for now.
So super, super contrasting. You know, someone looking at, you know, their phone at an angle or from far away will be able to see exactly the word that Cormac here is saying. But you'll look in there and you'll see that it's actually overlapping a letter here and I would rather things be quite neat and tidy, so let's change that by shrinking the width down, and you'll notice that it only goes on one side, so if we change the width we need to move the offset on the x-axis. So let's just move that across, and there we go.
So it's quite evenly there between both letters, both words, and that will play there. There we go. So that's playing that perfectly. So let's go here and see.
Sometimes you'll actually notice that, so it's not capitalising words correctly, so let's remove our selection there, and let's just click on the one and go into Caption and change. And let's just have a look and see if there's anything. Sometimes whenever we put the, uh, the uh, animated subtitles in, it can sometimes extend to a period where, you know, you're not able to actually see the whole word, and in that case, like I'm seeing here, this is a little close to the edge for me. So let's see if I move, uh, let's say if I move the Fieldmotion word down.
And there's no problem with, you know, putting things on three, on three, uh, lines, but the two lines there work quite well.
So let's have another look here, and you'll see here, digitalization with a Z. So again, that's the, uh, that's DaVinci, because it's an American company, uh, it will use American spelling, and that's great if you're an American company, but if you're based in the UK, for example just make sure you look through there and just change that as you go. So digitalization, you'll see that that's actually the American spelling, and don't worry, because we can just change this really easily. So if you're an American company, great, but if you're based over here in the UK, just make sure that you're checking through, just make sure everything's spelled, uh, the correct way for, you know, whatever region you're in.
And I think this has done a pretty good job of not actually spilling over too much into the sides here. Let's just make sure that's not going to the edge there. Yeah, great. So we can actually maybe make this a little bigger.
So again, if you're making any adjustments, like increasing the size, just make sure again you scrub through the video, just to make sure that, um, nothing's out, nothing's getting cropped out or nothing's too close to the edge.
So that's really it for subtitles. Um, so before we go, let's just go to the Deliver page, and you'll see that if you go all the way to the bottom here, let's go to Subtitle Settings, and then let's go into Format and select Burn into Video. What that does is that makes sure that the the subtitles are actually processed with the video as one file, so no matter what, you know, where you put it up, it'll always go up and it will always have those subtitles.
If you're doing this, just make sure that whatever platform you're putting your video on, let's say it's YouTube, for example, as I say, YouTube has a custom caption, um, on it, so just make sure that, you know, if you can, you turn it off, or just, you know, if, if it, if it doesn't allow for, um, you know, no caption, for example, just make sure that you're putting the correct, uh, spelling and all them, you know, you're, you're creating a customised SRT file, um, for your video.
But that's really it, so let's then add that to render queue, and that's ready to render. So yep, that's been the subtitles and, um, and just the formatting for, uh, for the social media videos.
So yeah, thank you very much for watching. This has been Adam from Fieldmotion, and this has been Fieldmotion's Growth Hub. Thank you very much for watching.
Below you can download a guide to follow along with to the video, See recommended settings and follow along with our checklist.
Presented by
Adam is the Video Strategist at Fieldmotion. He plans and produces video content that helps field service businesses get more from their job management software. He currently leads Fieldmotion's Customer Testimonials, Feature Fridays and the new Growth Hub series.
 EP. 05
3.55
 EP. 01
1.14
 EP. 04
3.55
Join thousands of field service businesses saving time and money every day. Setup is fast, and our team is here to help.

